What is Salesforce Digital Engagement
As being omnichannel became the norm, now it's necessary to connect with customers through diverse and convenient channels. Consider your own interactions: What platforms do you use to inquire with a company? How about your spouse or friends? Chances are, you'll encounter a range of digital options such as Facebook Messenger, WhatsApp, SMS, or even engaging through official websites via chatbots.
Guess what? Salesforce not only recognizes this trend but also offers a comprehensive solution to consolidate all these diverse channels into one centralized hub. Enter Digital Engagement – Service Cloud-based all-in-one solution.
With Salesforce's Digital Engagement, you gain the flexibility to configure multiple engagement channels, predefine questions and responses, and even incorporate AI to enhance customer support by providing optimal assistance.
The addition of chat and self-service options resulted in up to 40% case deflection and containment, increased support agent productivity, and reduced per-interaction costs.
Supported channels and required pre-work
Whether leveraging popular messaging apps such as SMS, Facebook Messenger, Apple Business Chat, WeChat, and WhatsApp, or tapping into the expansive reach of web chat and social media platforms like Twitter, Facebook, and YouTube, companies can seamlessly deliver consistent and highly efficient service experiences. This enhanced efficiency is further facilitated by automation tools, with chatbots playing a pivotal role in ensuring a frictionless customer engagement process.
Strategic configuration is essential in this case. It involves the meticulous definition of settings, encompassing key steps such as enabling Omni-Channel functionality, activating Messaging capabilities, setting up queues, judiciously assigning users to these queues, and selecting a platform.
You can either create a bespoke application featuring the Omni-Channel utility item or opt for the convenience of the pre-configured Service Console app, which inherently includes Omni-Channel functionality. This strategic setup not only optimizes operational workflows but also lays the groundwork for a seamlessly integrated and personalized customer service experience.
With all the necessary preparations in place, the next step is to delve into the process of incorporating various communication channels.
SMS
The SMS channel presents an avenue for direct communication with customers through SMS chat functionality. The initial step involves establishing a Letter of Agreement (LOA) with the relevant cell phone provider. Once you secure the LOA, the subsequent action is to initiate contact with Salesforce through a Support Case. Within the Support Case, the LOA is attached, and a request is made to activate the support for the SMS channel. This ensures compliance with regulatory requirements.
Facebook Messenger
When setting up the Facebook Messenger channel, it's imperative to have an active account on the platform and a corresponsing public page established, complete with the "Send Message" option enabled. The administrators of this page have the choice to configure the routing directly to the Queue or defer this setup for manual configuration at a later stage.
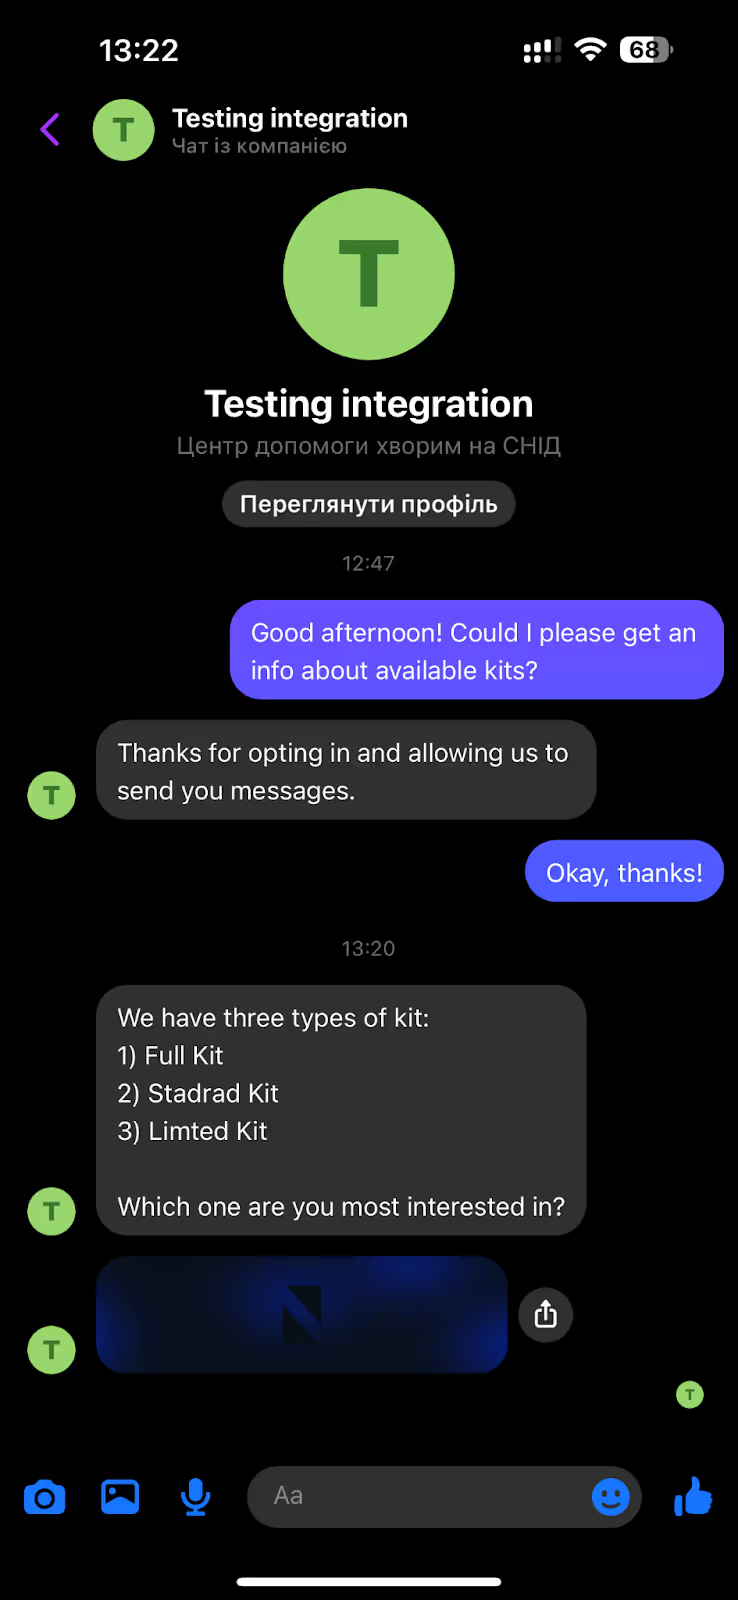
From the customer's perspective, the interaction is akin to engaging with any friend on Messenger. What's noteworthy is the seamless nature of the interaction – customers are unaware that the business is utilizing Salesforce for communication rather than the native Facebook Messenger platform.
Setting up a WhatsApp channel is similar to the configuration process used for other channels. The first step involves activating the business WhatsApp phone number through the dedicated WhatsApp support channels. The subsequent step is to submit an email request to Salesforce, seeking the activation of the WhatsApp channel. The email should include the Organization ID, email credentials, comprehensive company information, and the designated WhatsApp number.
Upon submission, once you receive the confirmation email from Salesforce, you gain the green light to seamlessly integrate and utilize the WhatsApp channel within your organization.
How to configure Digital Engagement
Depending on the selected channels, you would have a bit of a different process to configure them. But there are some steps that are common to all.
Purchasing the license
Although it seems obvious for Digital Engagement to be included in the standard Service Cloud License, unfortunately, it’s not. Setting it up is a separate process.
Enabling the Omni-Channel tool
Omni-Channel is a crucial part of Service Cloud. It is the entry point of the agents and the main working board for them.
- Make sure that the “Enable Omni-Channel” checkbox is checked.

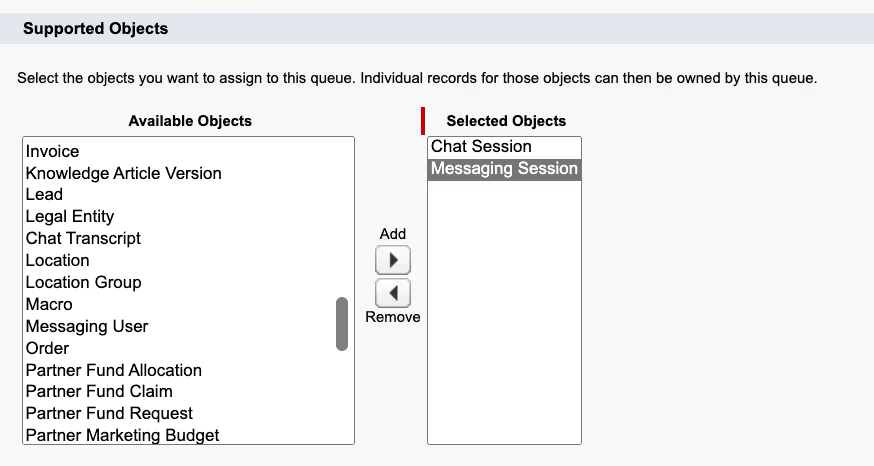
- Once you have enabled Omni-Channel, you need to create a queue. The Queue represents the agents that will handle the incoming messages. While creating a queue, add a Messaging Session object for the support for digital platforms and/or Chat Session for the support of Chat. Define the list of roles, users for the queue and hit the Save button.
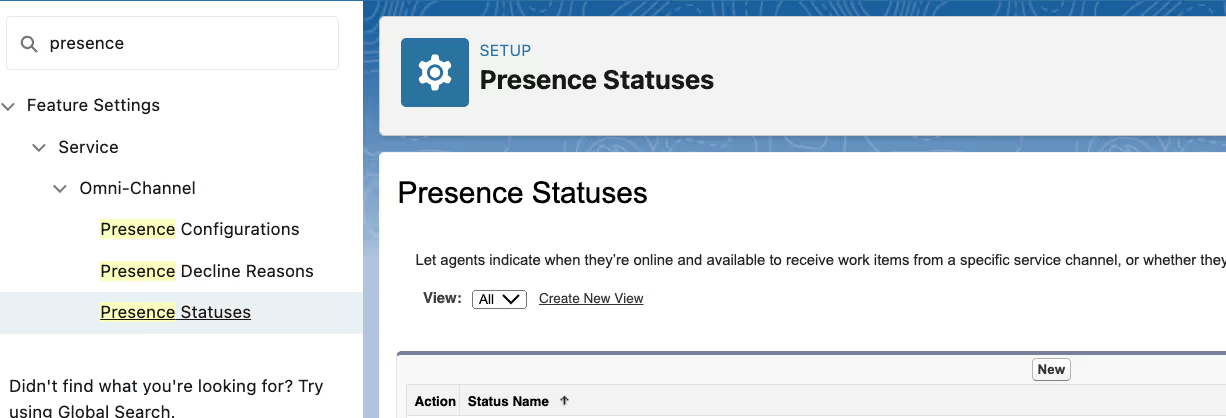
- Define the Omni-Channel presence statuses. From the Setup, search for “Presence Statuses” and press the New button.
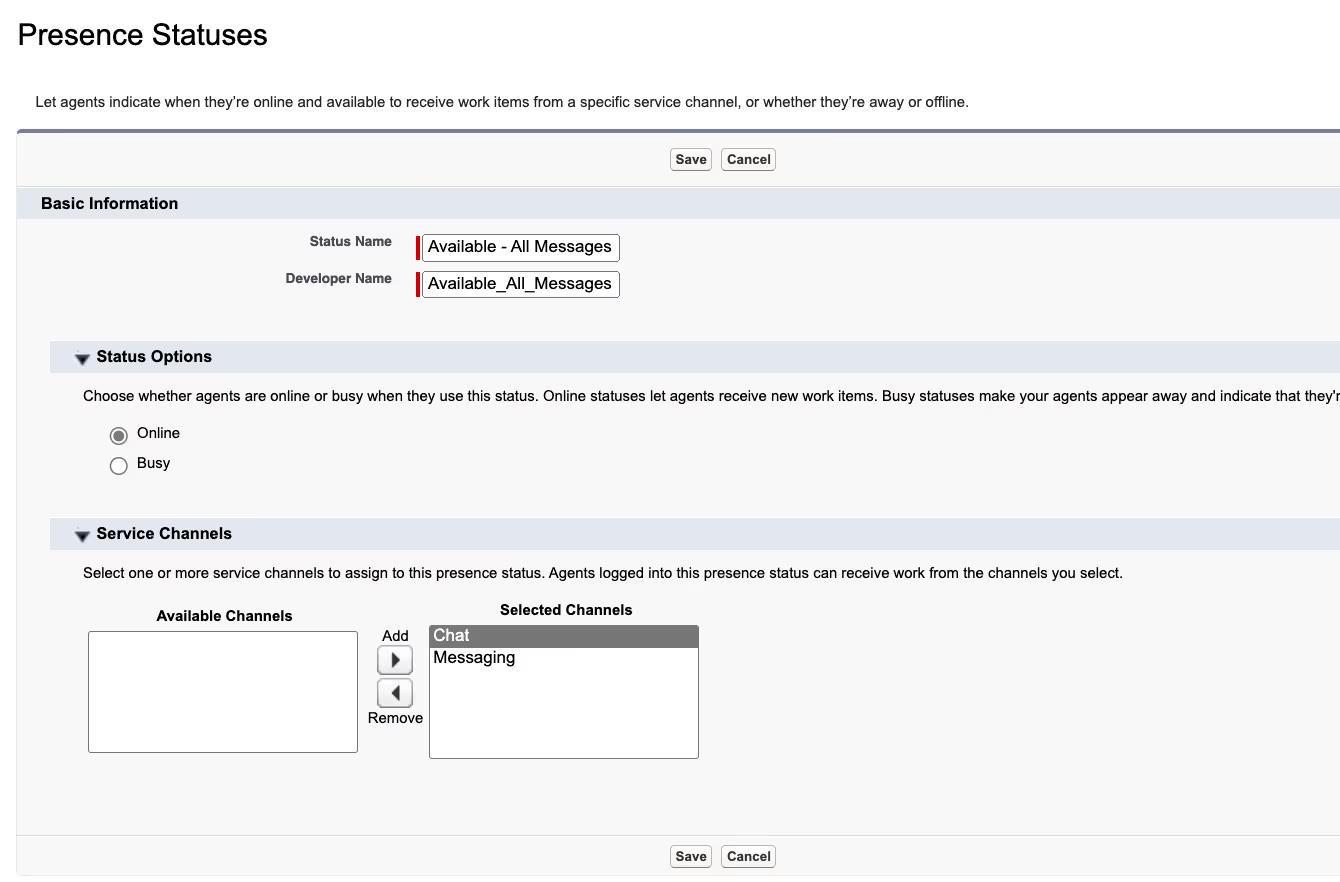
- Create Omni-Channel status with the ‘Available” option. It indicates that you are able to accept requests. Add the Chat channel for web communication and/or Messaging channel for the messengers communication.
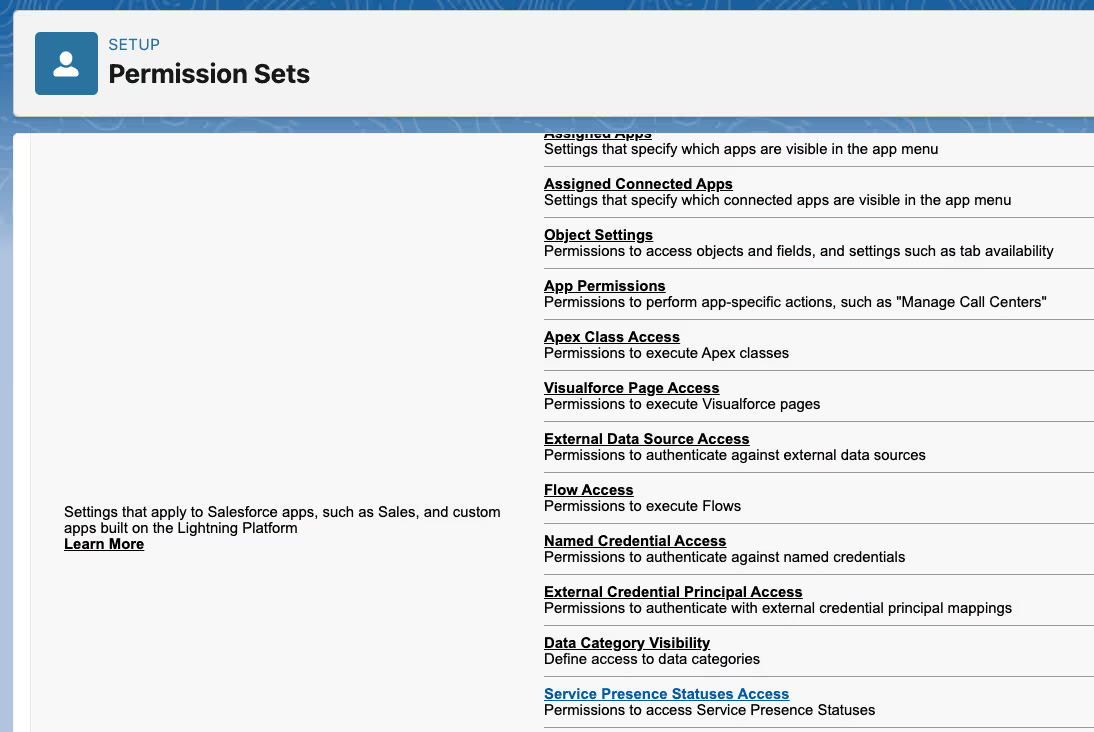
- Add this status either to the existing permission set or create a new one and assign it to the user who will use Omni-Channel. In the permission set, open the “Service Presence Status Access” option and add a newly created status.

- From the Setup, search for “Routing Configuration”. Create a new one.
- Add routing name, priority and other fields.
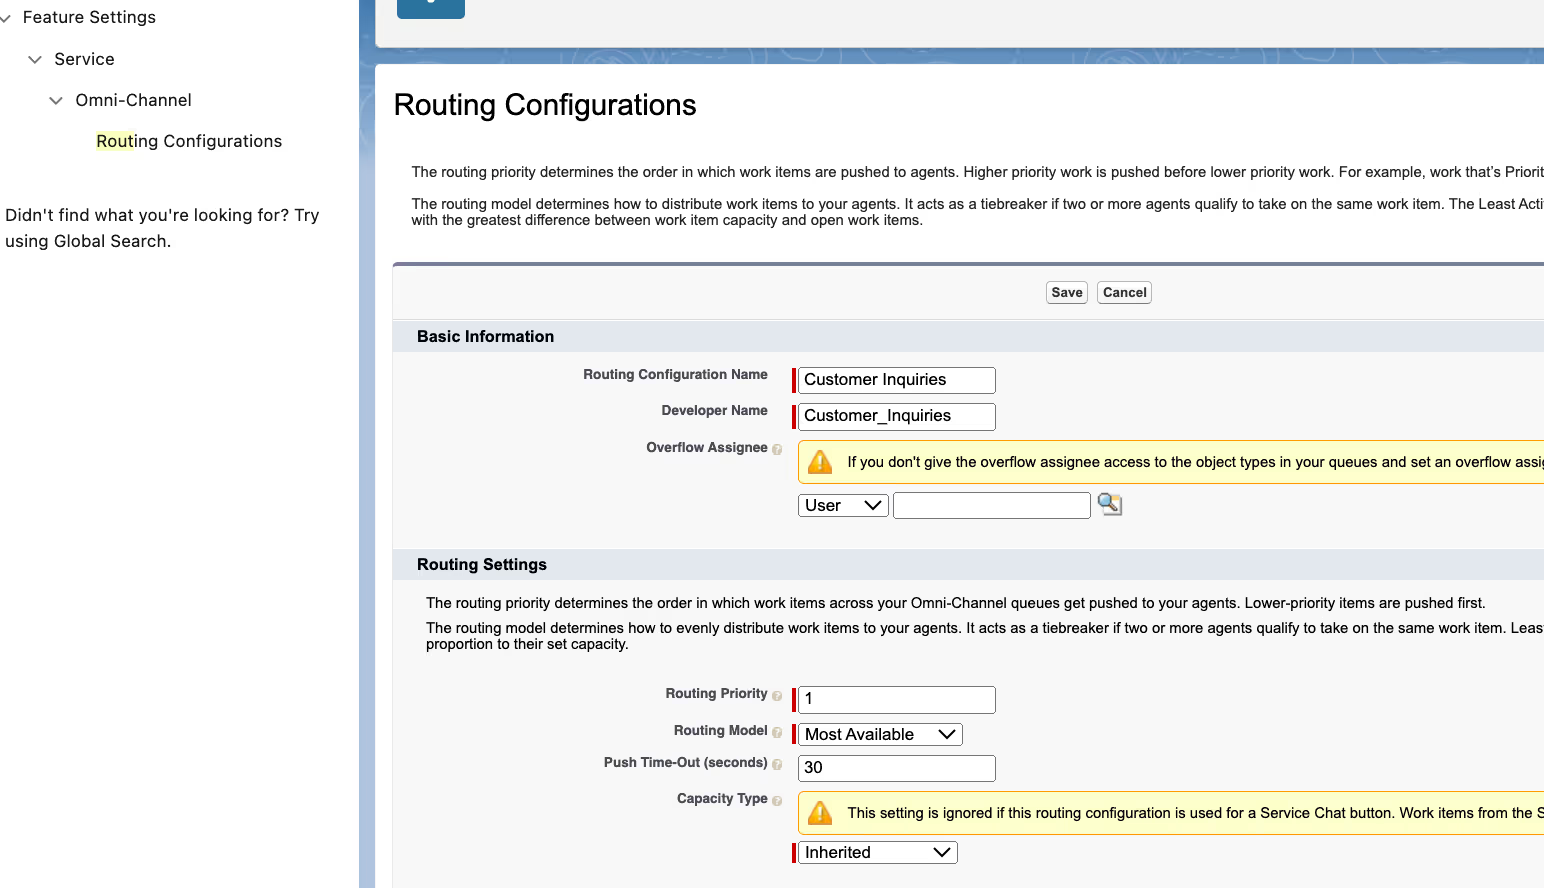
- Assign this configuration to the queue that you have created previously.
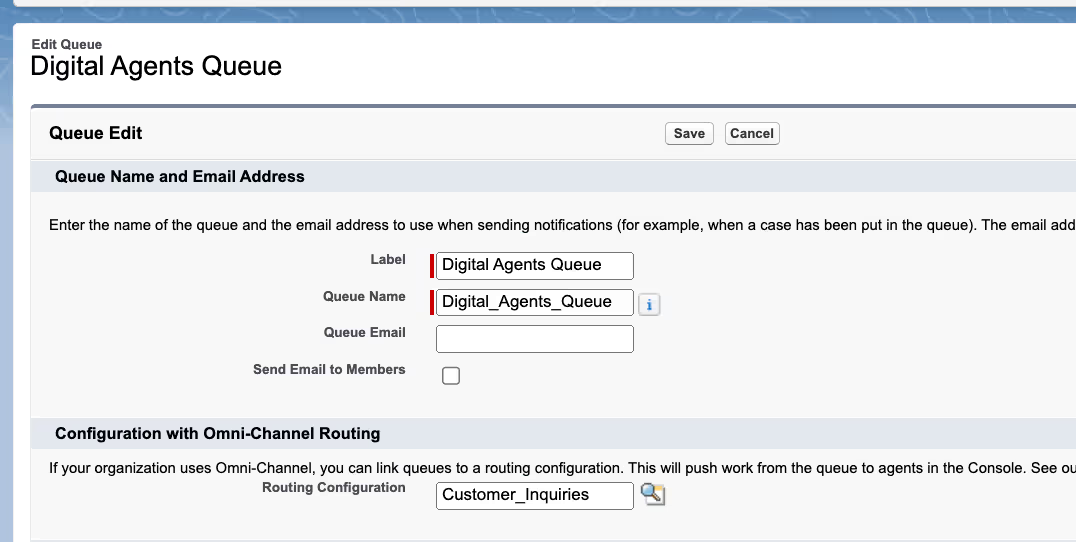
Once the steps are done, we are good to go.
Enabling Messaging
- From the Setup, search for “Messaging Settings”. make sure that the Messaging toggle is enabled. It can be enabled only if you have purchased the Digital Engagement License.

- And that’s pretty much it, we can start creating the Messaging Channels.
Creating a Messaging Channel
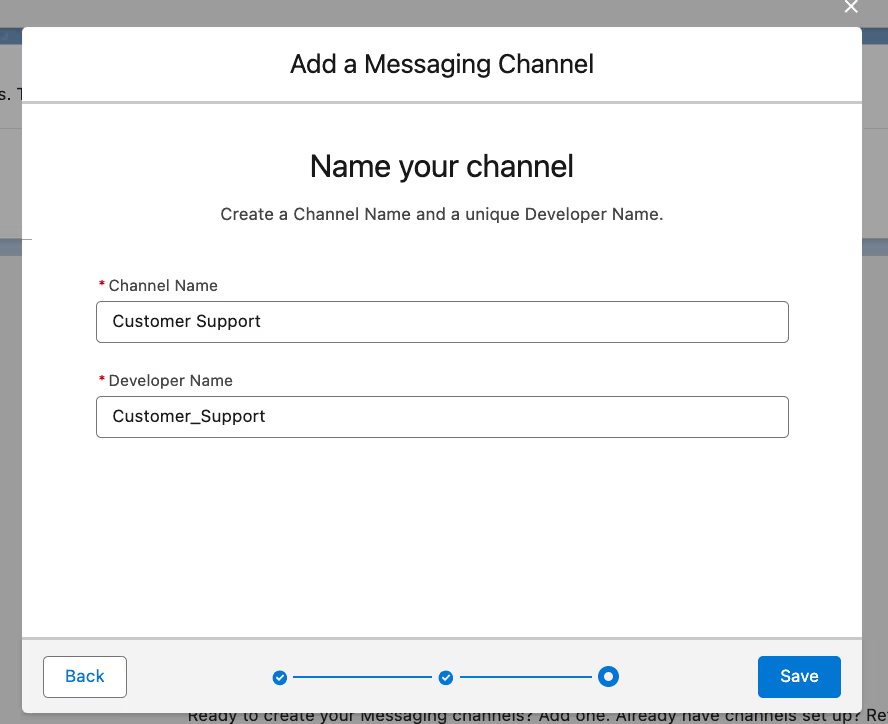
- From the “Messaging Settings” in the Setup, create a New Messaging Channel

- Select the desired channel and go through the wizard. More details for each of the channels were described previously.
Messaging Components
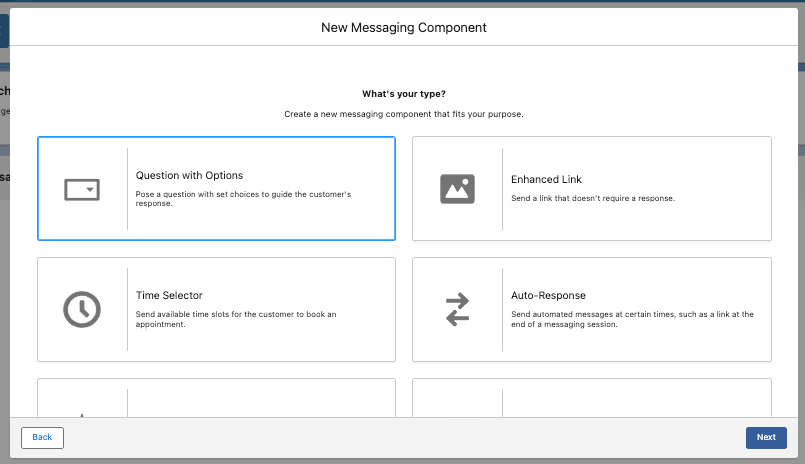
You can enhance messaging experience with the Messaging Components. It allows you to add interaction elements to the chat. There are 6 options to be created:
- Question with Options
Allows to pose a question with predefined set of choices to guide the customer’s response
- Enhanced Link
Sends the link that does not require a response
- Time Selector
Sends available time slots for the customer to book an appointment
- Auto-Response
Sends automated messages at certain times, such as link at the end of a messaging session
- Notification
Sends an informational message, such as a delivery update
- Form
Prompts customers to complete a series of fields
- From Setup, search for “Messaging Components”. Create a new one.

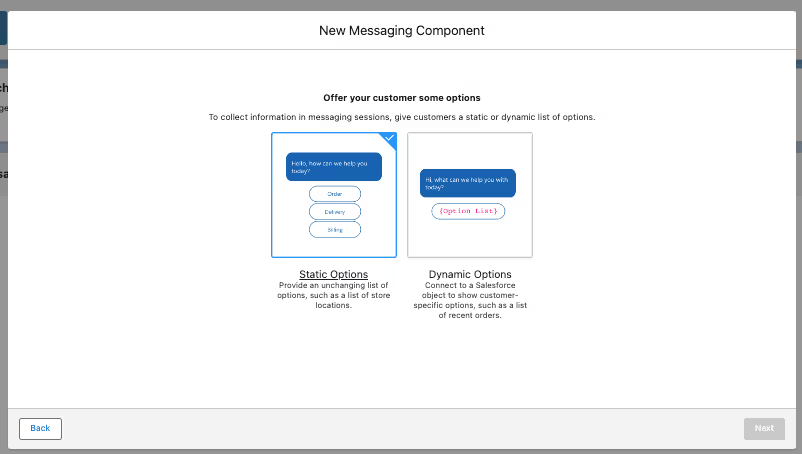
- Select the desired component. For now, let’s select a Question with options.
- You can either select static list options or dynamic ones.
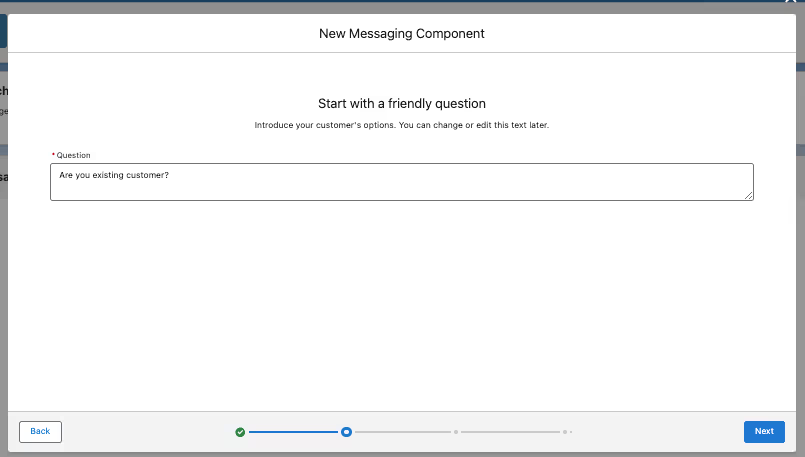
- Add the question.
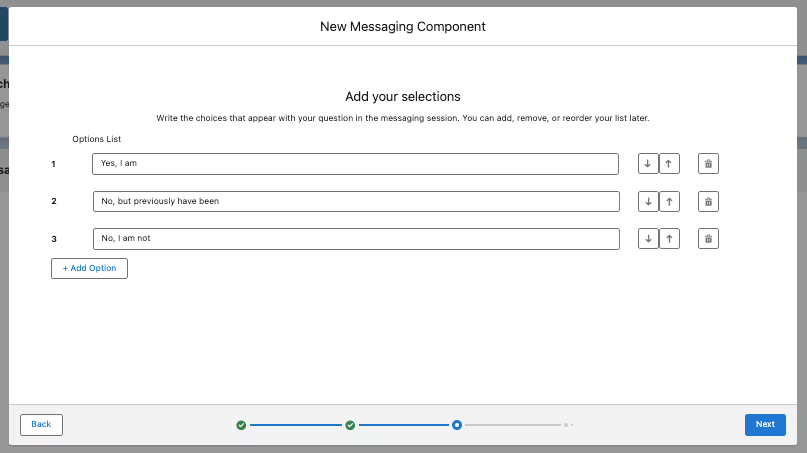
- Add possible answers.
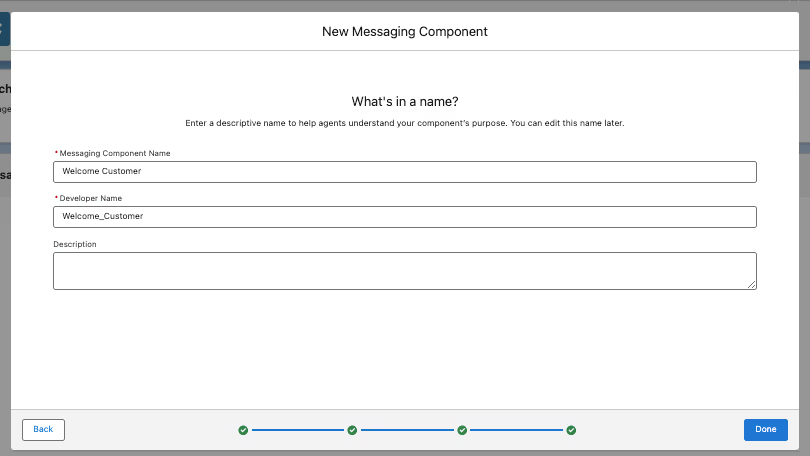
- Add Name information on that question. Click ‘Done’, and you’re good to go!
Salesforce Web Chat or Messaging for In-App and Web
Salesforce has expanded on its legacy product called Web Chat and made it into Messaging for In-App and Web with new possibilities for users. Let’s see how it works.
- Add the Messaging permissions. Users that will use the chat need to have a Permission Set License assignment. Make sure that ‘Messaging for In-App and Web User’ is assigned.

- Create a permission set. Make sure the ‘Messaging for In-App and Web Agent’ checkbox is selected under App Permissions. Assign this to the users that will need tol use the chat.

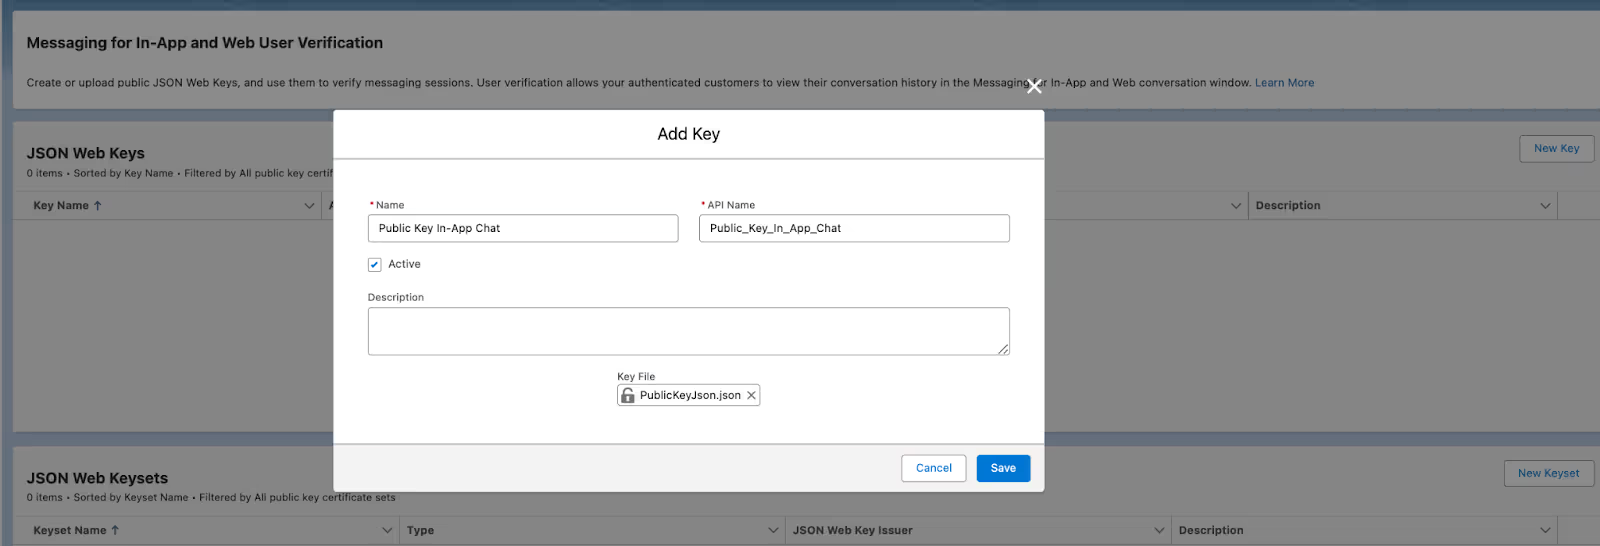
- From Setup, search for ‘User Verification’ and upload a JSON Web Key.
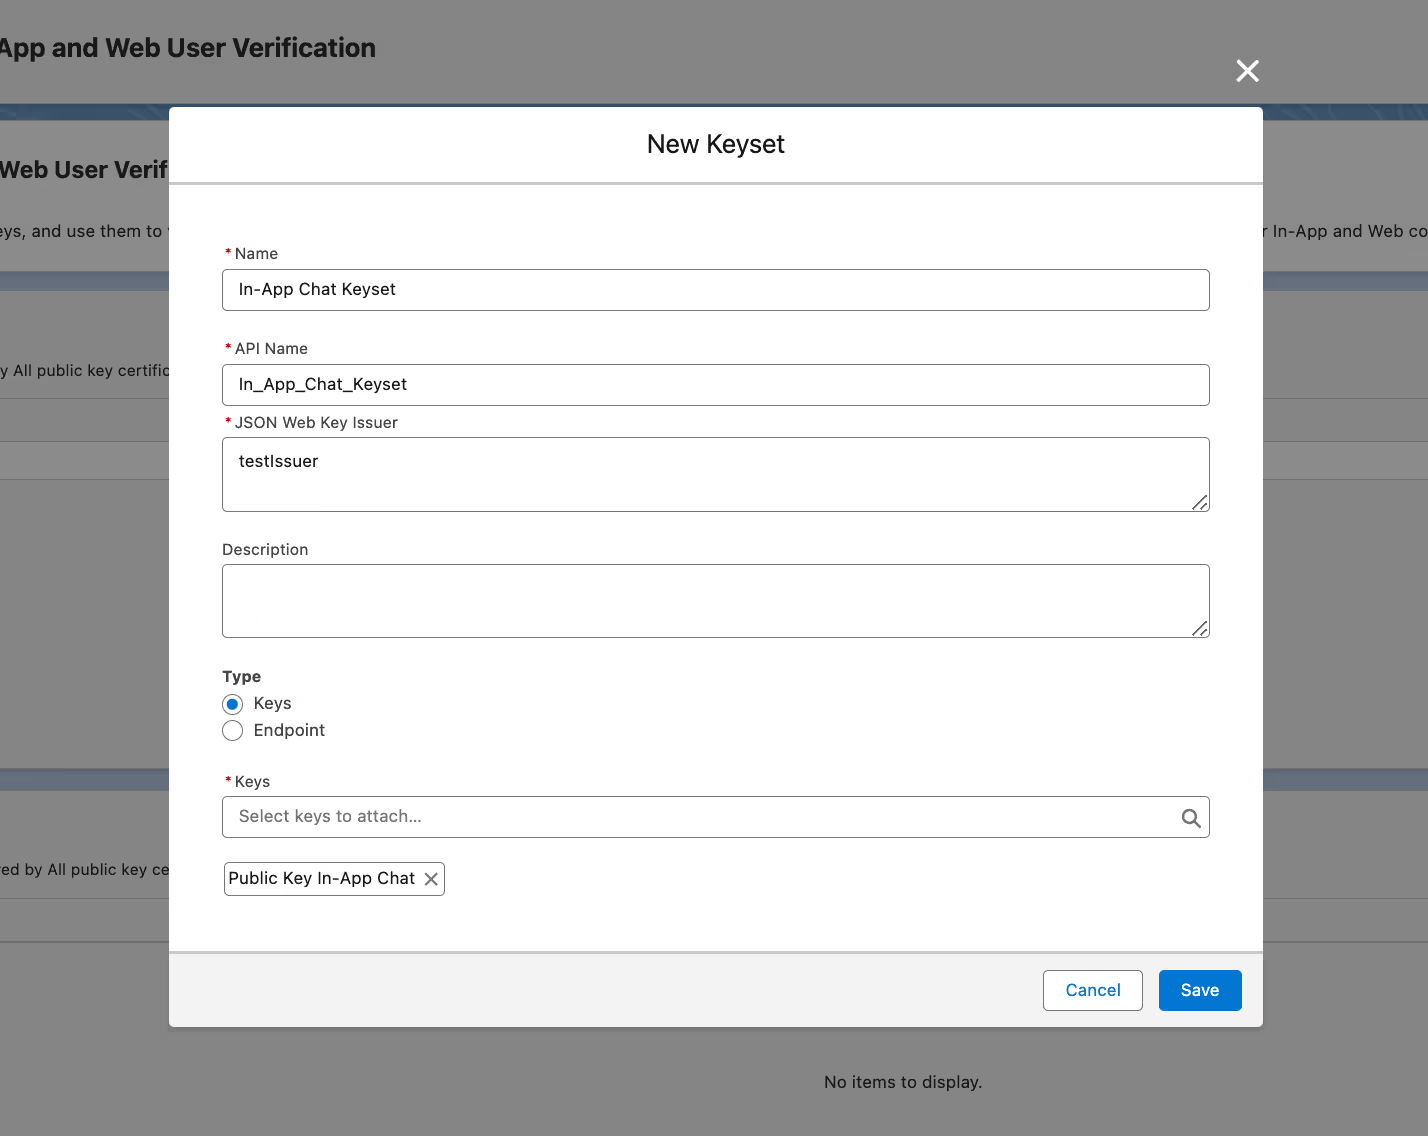
- Create a Keyset. Add the Name, select the JSON Web Key, and enter the issuer data. It can be extracted from the JWT once decoded.
- Add User verification. Under ‘Messaging Settings’ in Setup, open ‘Edit’ for the messaging channel and check the ‘Add User Verification’ checkbox.

- From the list of channels, open the needed channel and add the User Verification Configuration.

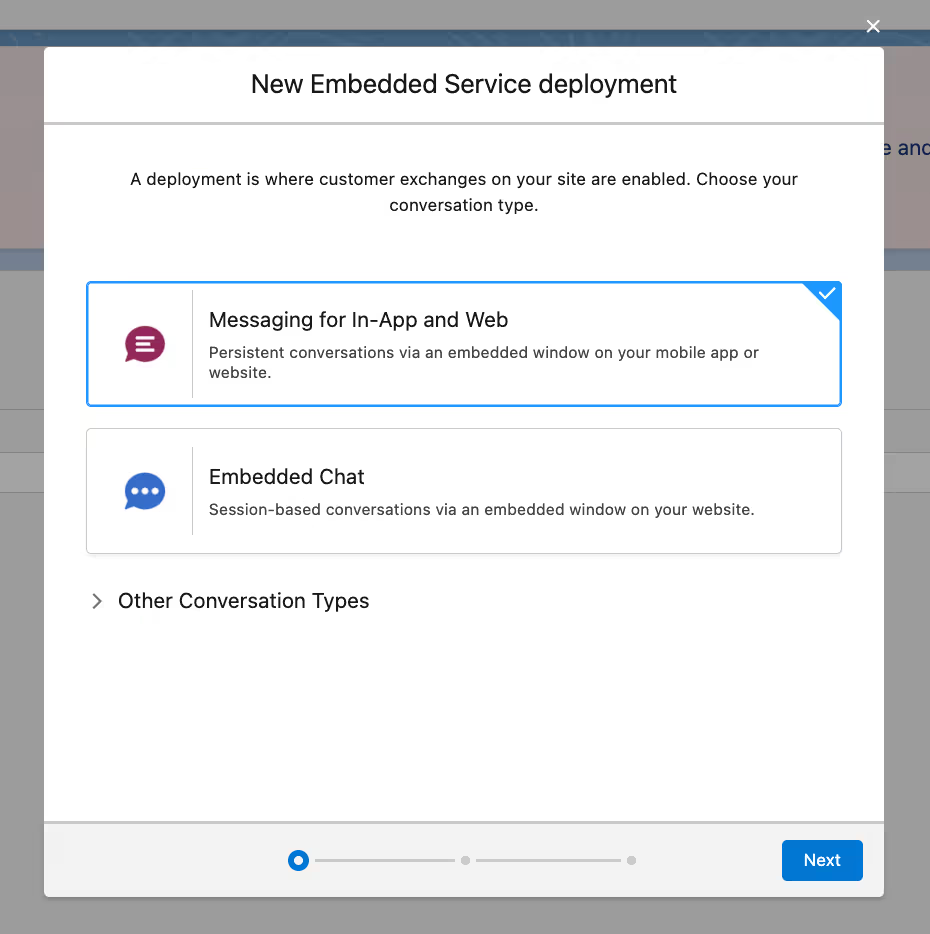
- From Setup, search for ‘Embedded Service Deployments’. Select ‘Messaging for In-App and Web’.
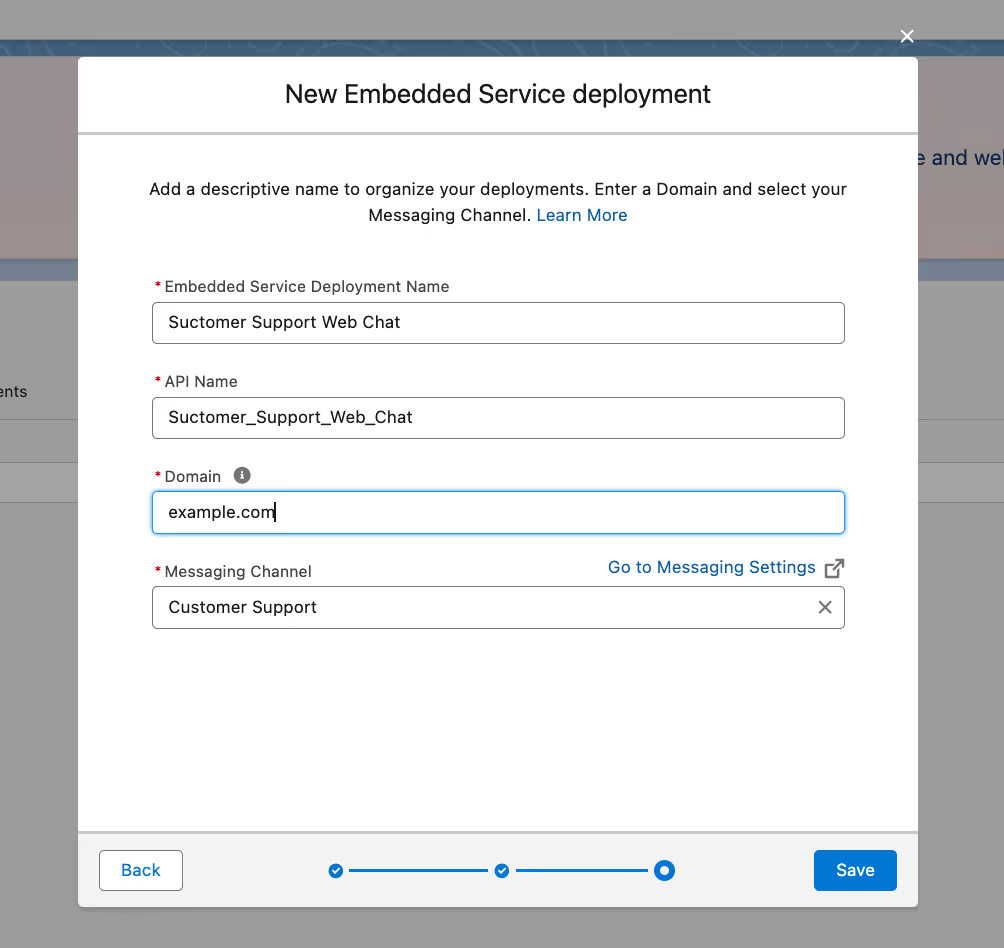
- Add the Messaging channel. Under ‘Domain’, add the address of the resource you want to add the chat to.
- Once it is created, press the ‘Publish’ button on the top-right side of the page.
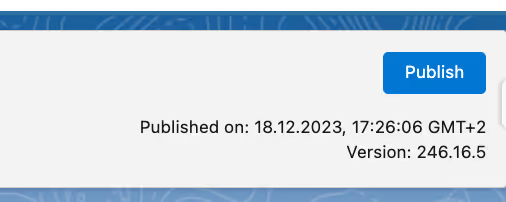
- Now you should be able to add a web chat to your sites with a script or add it to the Experience Cloud site from the builder with the Messaging Chat component.
Enhancing messaging channels with AI – Salesforce Einstein Chatbot
Salesforce strongly advocates the integration of smart chatbots to elevate performance metrics and bolster customer satisfaction. One of the noteworthy features within the Salesforce ecosystem is the Einstein Chatbot, a sophisticated AI-driven tool that seamlessly streamlines various customer-centric tasks.
Companies can incorporate Einstein Chatbot or any other bots in their messaging channels including Facebook, WhatsApp, and SMS.
Key Capabilities of Einstein Chatbot:
- Seamless record creation.
- Providing customers with details on existing records.
- Automated knowledge sharing.
- Valuable feedback gathering.
How to set up an Einstein Bot:
- Enable Chatbots in Setup
- Navigate to the Einstein Bots setup page and create a new bot.
- Define Popular Requests as configurable options.
- Activate the configured bot.
- Integrate the chatbot into any channel by configuring its settings through the Bots overview page. Select the desired channel to optimize the bot's application.
The extensibility of the Einstein Chatbot allows organizations to adapt and enhance its functionality over time, ensuring it remains a dynamic and valuable asset to customers’ satisfaction.
Test drive of Salesforce Digital Engagement to Facebook integration
For the demonstration purposes, we will use the Facebook channel.
Prerequisites:
- Have a Facebook account;
- Have a page created for the Facebook account with the Message action added to the page.
The process of adding the channel is described above in the Facebook Meseenger section, please feel free to go up and check again. You’d need to add access to your page in Facebook upon creating an account and provide the necessary permissions and configurations in Salesforce to use the Facebook Messenger channel.
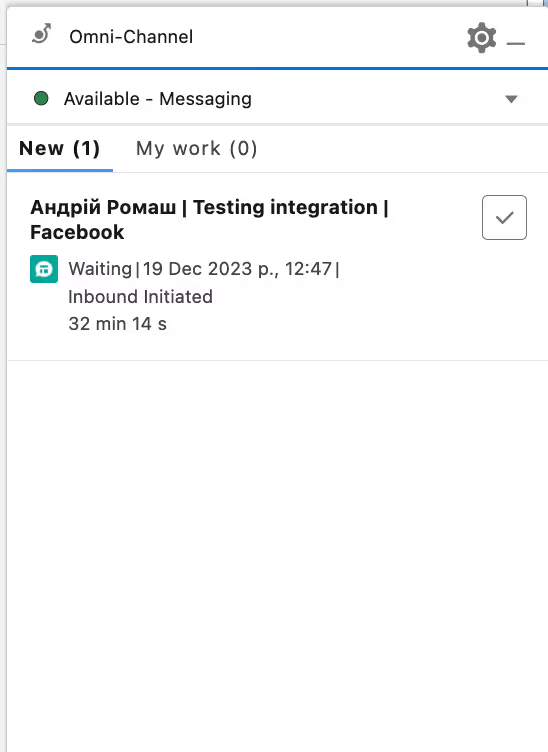
- Log in the Omni-Channel section in Salesforce.
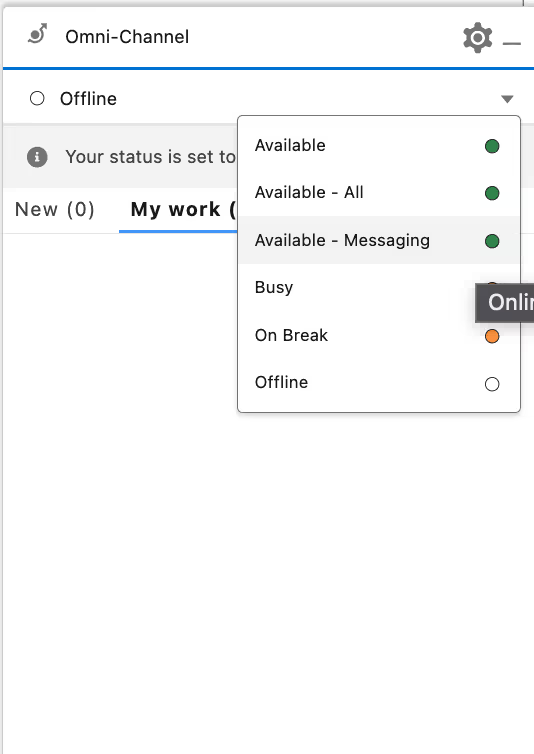
- Now let’s go to the Facebook Messenger mobile app and try to contact the company.
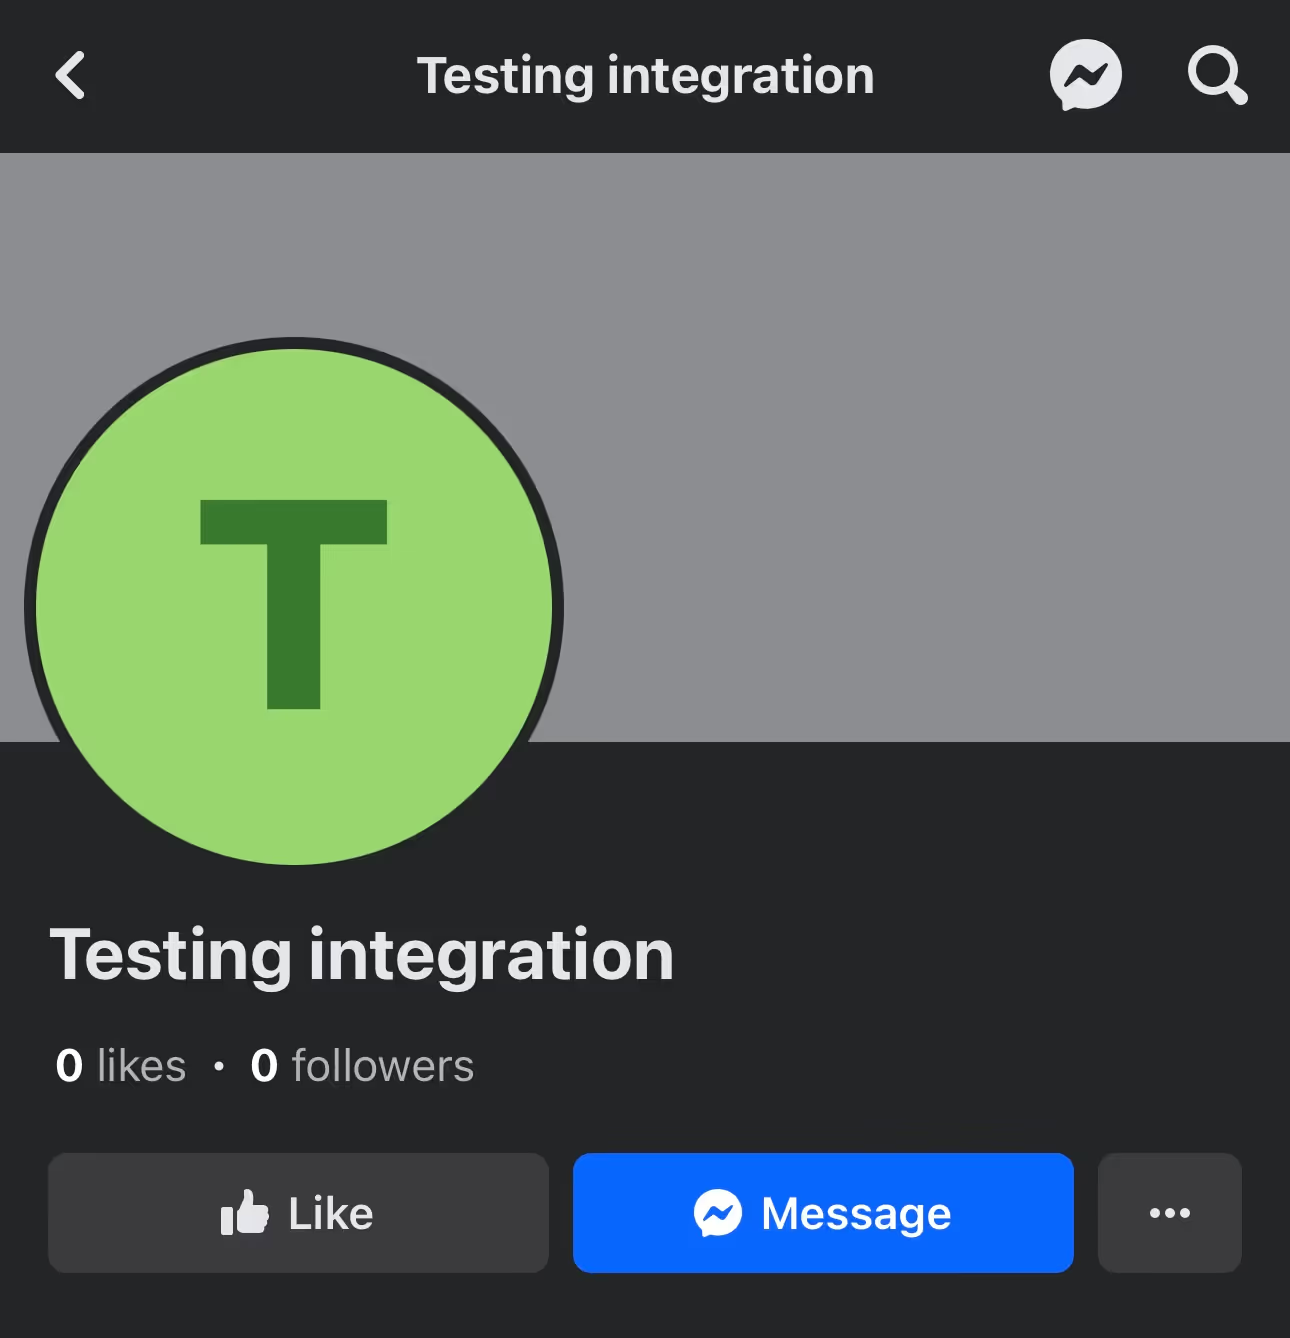
- Open the Messenger and try asking a question.
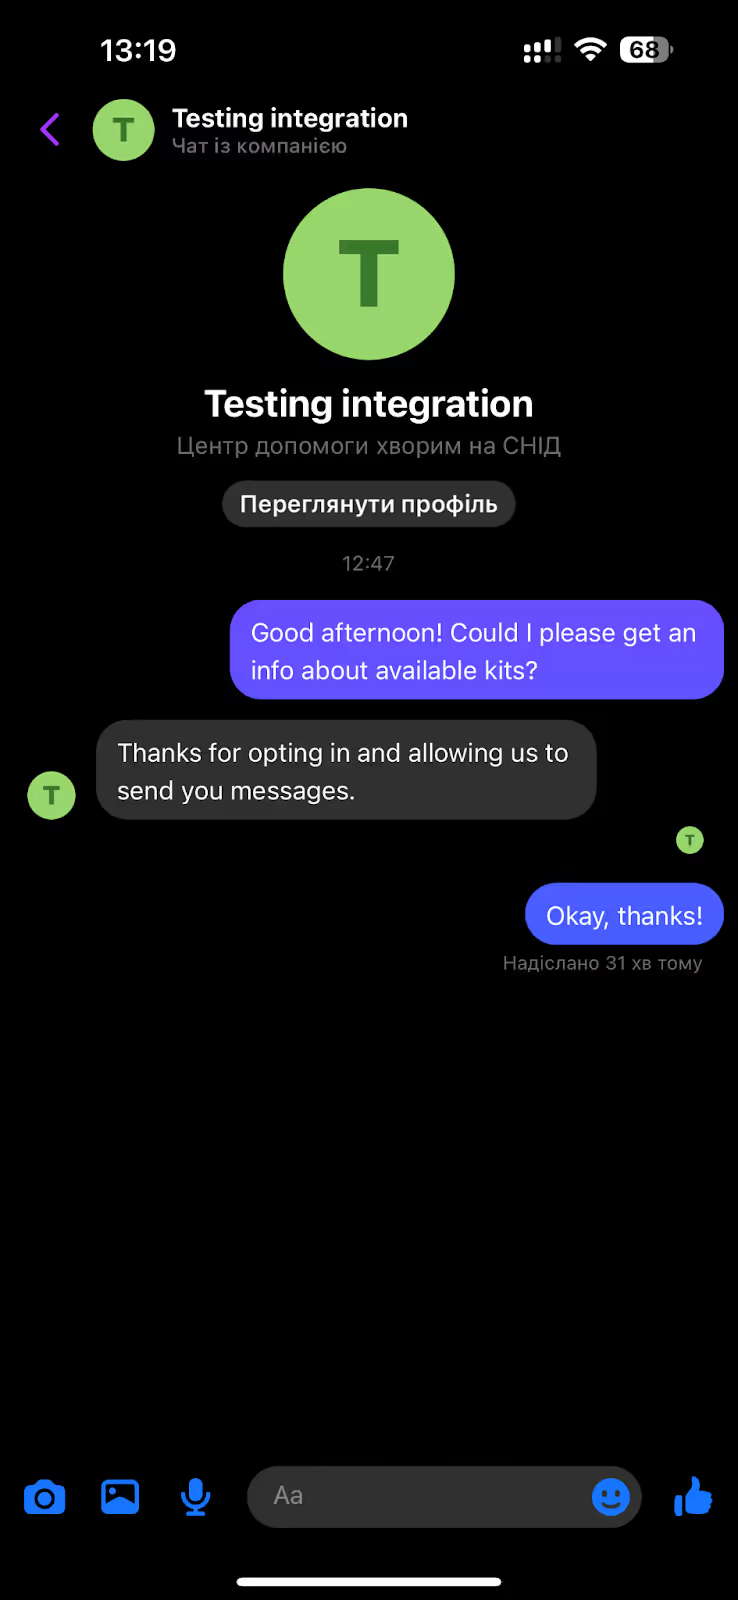
- Now we see that the new request appears in the Omni-Channel window in Salesforce. Accept it and start the chat.
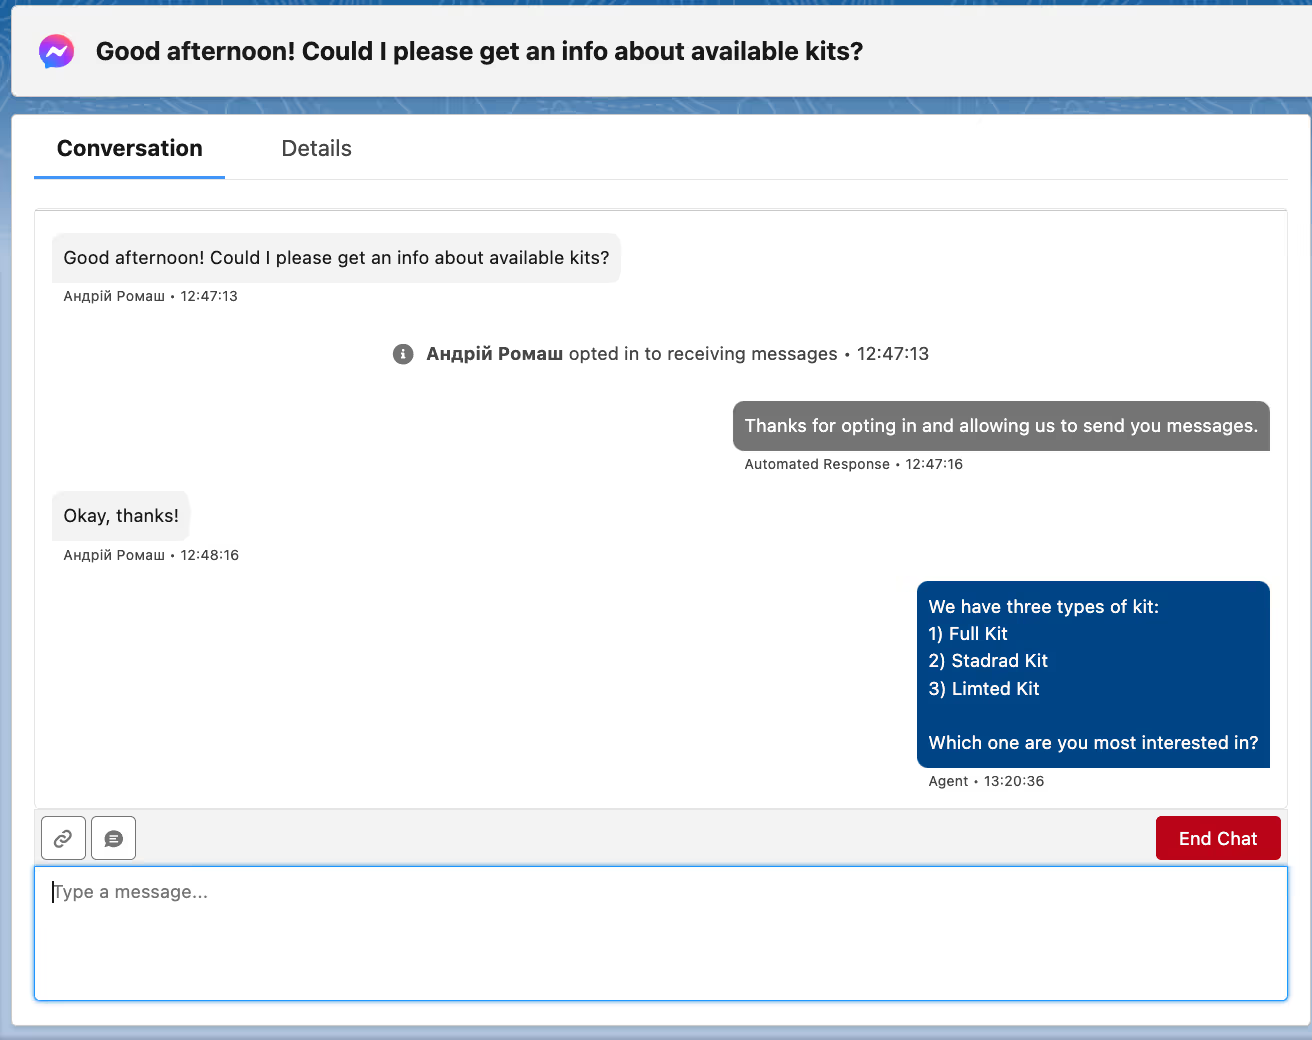
- Once the conversation is over, press the End Chat button.

Limitations
In addition to existing messaging integration limitations, the Salesforce Digital Engagement platform presents further restrictions, such as the absence of a free trial and a mandatory $75 per user per month Digital Engagement license.
Here is a quick summary of all the Salesforce Digital Engagement limitations:
- Initiation of conversations is restricted, preventing the company from sending the first text message.
- The absence of a free trial limits users' ability to explore the platform before committing to a purchase.
- Salesforce Digital Engagement is restricted to be used only with specific communication channels, omnichannel, and the Service Cloud console.
- Each Digital Engagement license includes only 25 bot conversations, potentially limiting scalability for businesses.
Despite those limitations, Digital Experience offers numerous advantages. Companies can easily set up multiple communication channels to interact with customers in various ways. These channels are flexible, allowing for quick updates and expansions.
The incorporation of chatbots, auto-responses, predefined forms, buttons, and links enhances the overall customer experience when engaging with the support team. And for business operations, it has proven to be a huge resource saver – calculate it yourself!
together


.webp)